- Deerwood Elementary
- Homepage
Tech's Help & Tips 💡
-
How to Submit a Service Desk Ticket 🧰
Submitting a Service Request using Service Desk
A shortcut icon to Service Desk can be found in classlink.
The website can also be accessed from any browser at: https://servicedesk.osceola.k12.fl.us/
Service Desk will automatically log in with the Active Directory (AD) credentials of the person logged on to the computer. This information will be filled in automatically when opening a request.
Service Desk will open to the following window.
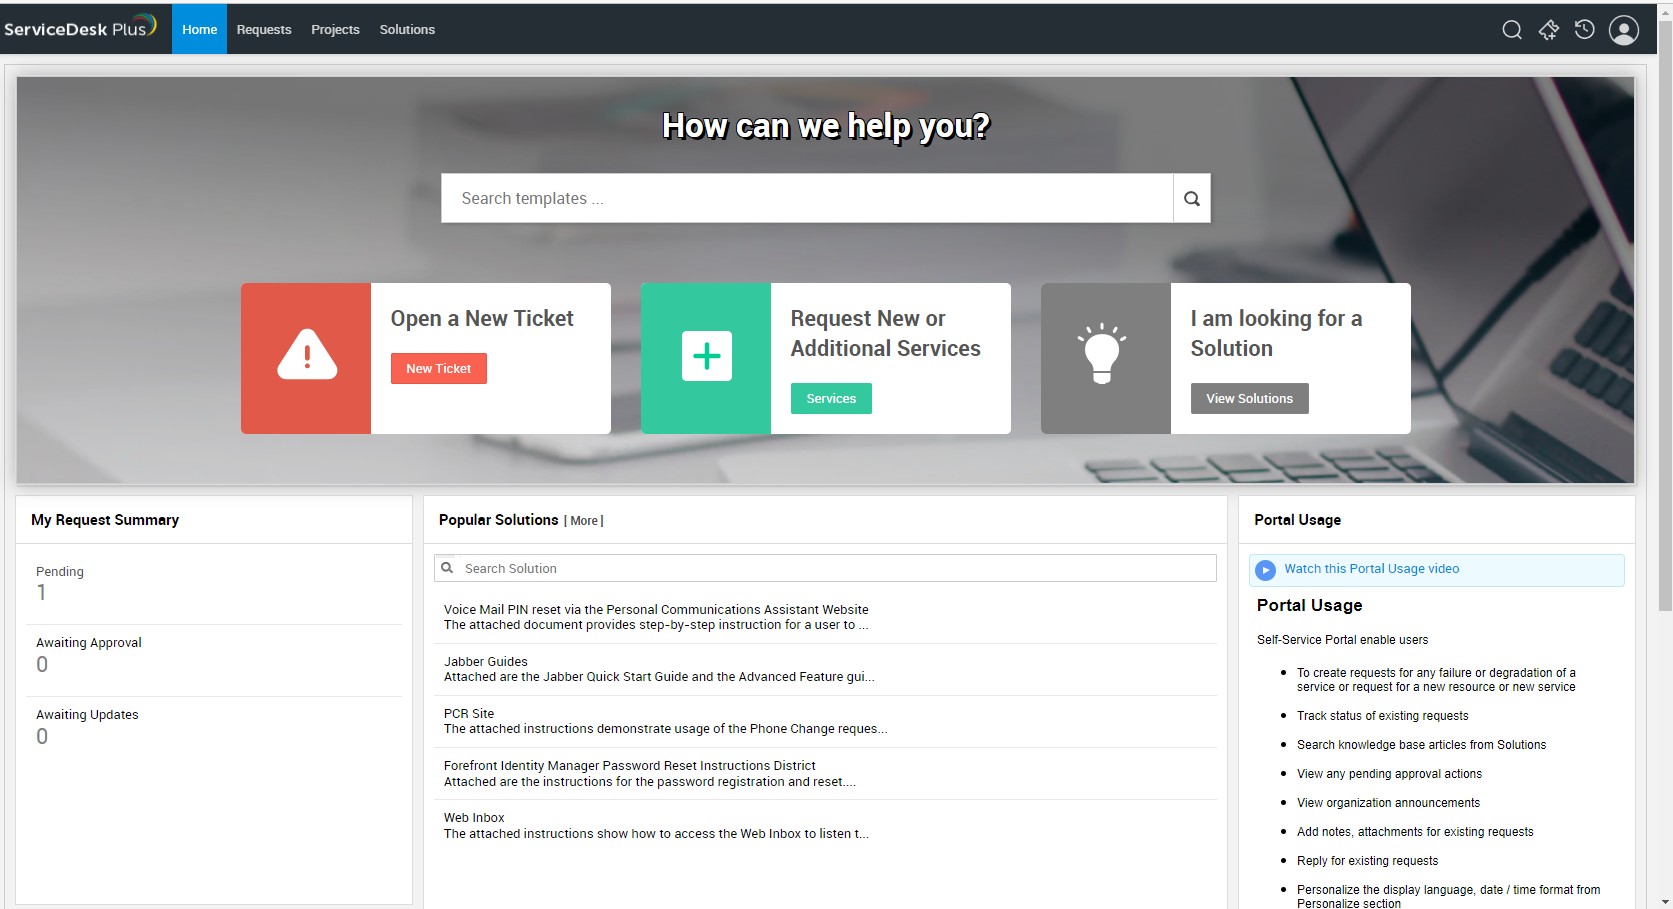
To submit a new request Click “New Ticket”
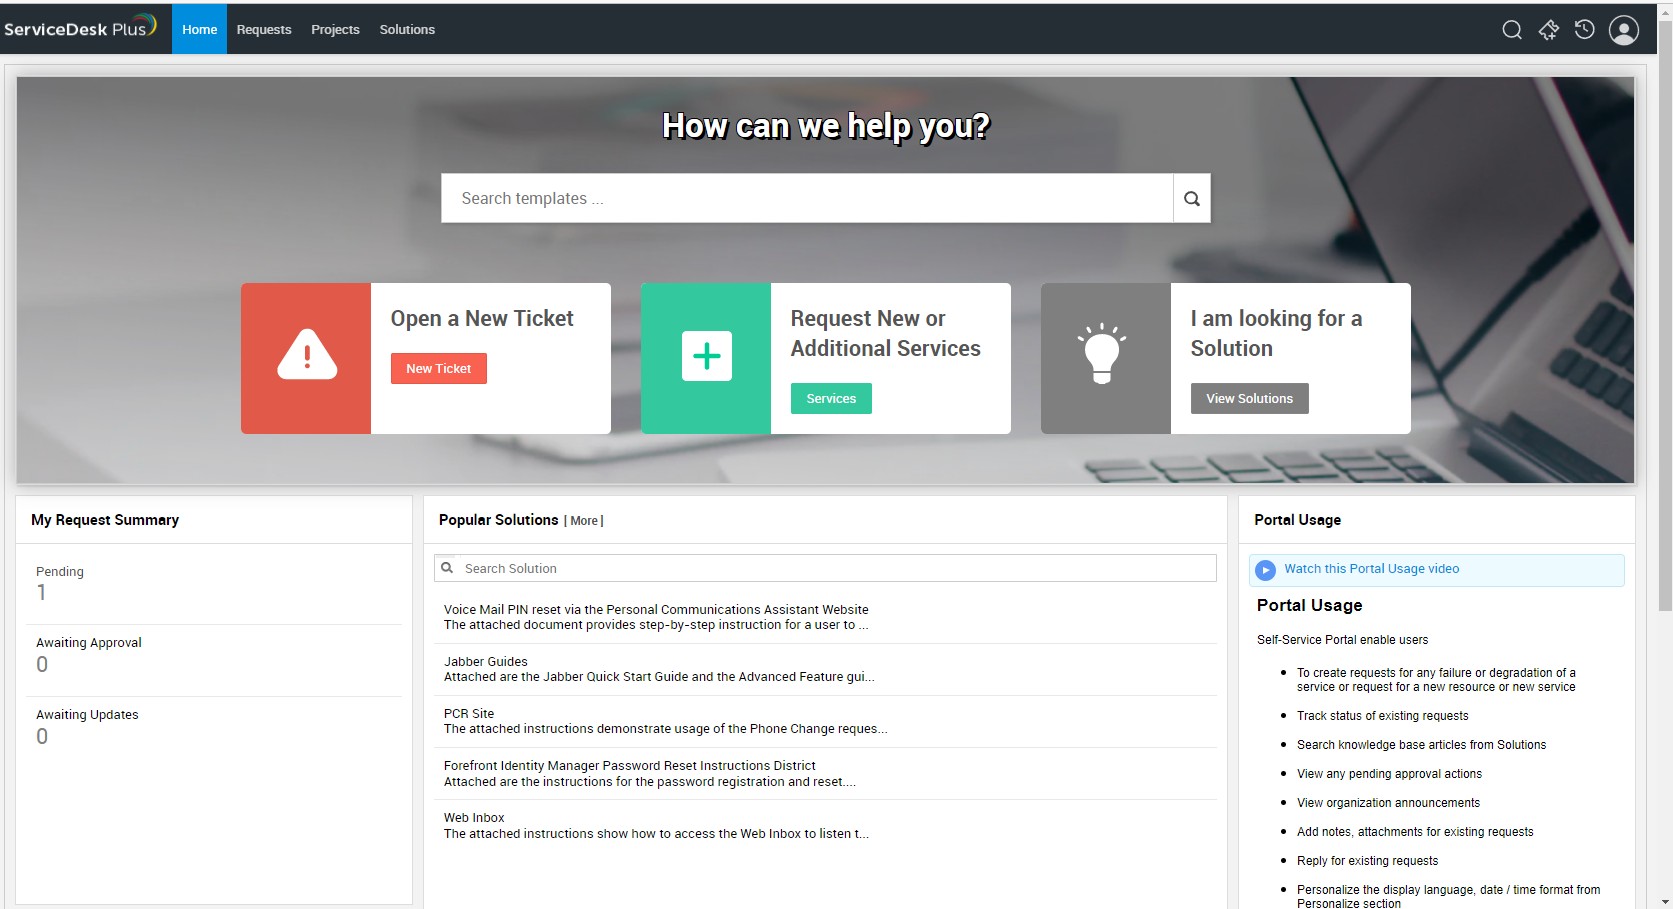
Alternately, click on the requests tab in the top left portion of the screen on the black header.

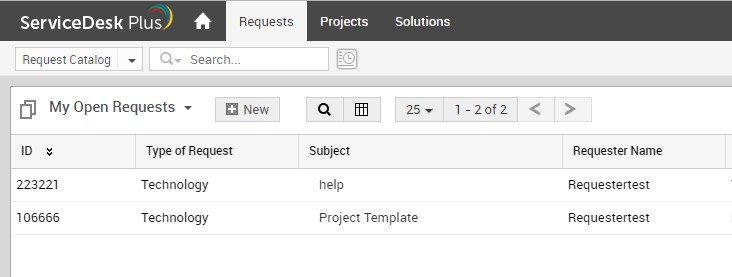
After the request tab is selected, you can start a new service desk request by clicking “new.”

The request ticket will open. There are four boxes that are required to be filled in. If the user is logged into the computer with their Active Directory Account, Name & Department/School, Extension, will automatically appear. Fill out BLDG-Room Number, Subject and Description. An alternative Contact Number can be filled in if you would like to be contacted at a different number or extension than you are assigned.
The description should include the computer name (instructions on finding the computer name at the end of this document) & describe the problem that needs to be resolved.
For example, PowerPoint is not working on my computer. Describing the exact problem and being detailed is always very helpful and may help in getting a faster resolution.
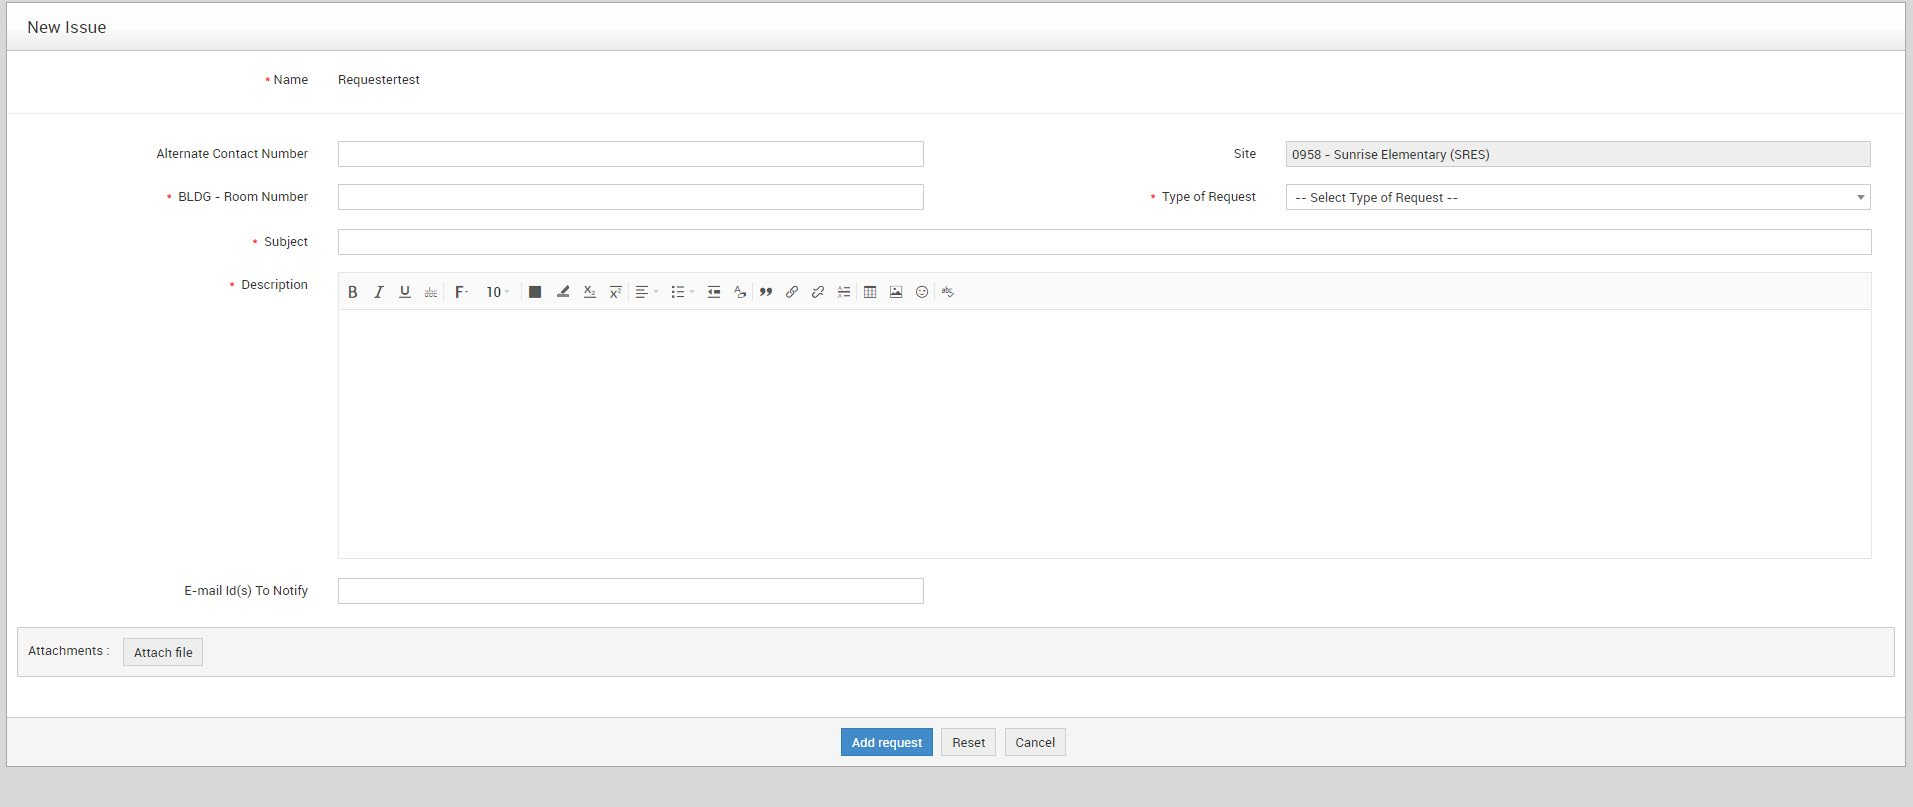
After all the information is filled in, Request Type will allow the end user to send the ticket to Technology or Custodial Services. This is not a required field, but will help direct the ticket to the correct person. By default, the request will be sent to the local Tech. It will be forwarded to the proper department if necessary.

An attachment can also be added to the ticket if needed. When finished filling out all necessary information, click Add Request. The request is sent to the School Tech or Custodian.
At any time the status of the request can be checked. Click on the Request Tab. The list of tickets opened for or by user will be listed. Hovering the Mouse over the subject will give the description of the request.
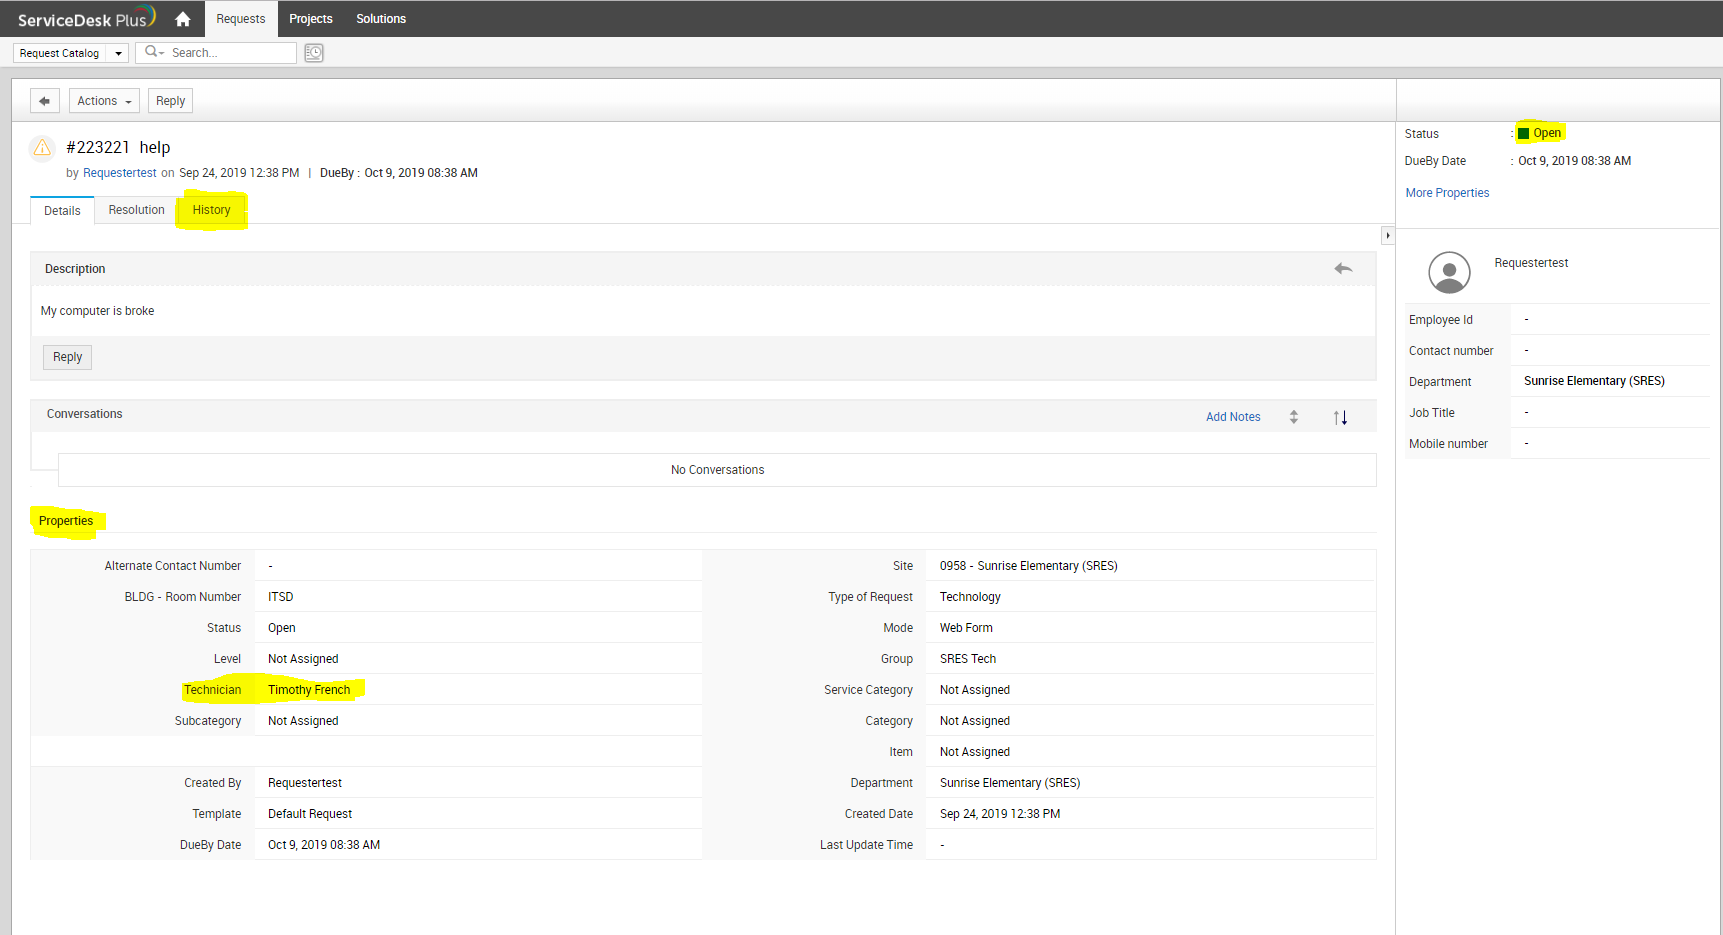
Clicking on the subject will open the request. Fields such as History, Status, Assigned Technician information is available. The user can also click on Reply to send an email if more information is needed. The history of the request will show all information regarding the ticket, including the amount of time the ticket was open, all emails, and if it was escalated to District level.
By submitting tickets, it helps the school technician, zone tech, and District's IT Analyst keep track of work orders being completed. It also allows a better flow of organization by answering to your request by level of priority or request time.
-
Share Files with OneDrive 📁
Share a file or folder
-
Sign in to office.com and select OneDrive.
Note: If you're using Microsoft 365 operated by 21 Vianet, sign in with your work or school account to login.partner.microsoftonline.cn and select OneDrive.
If you're using Microsoft 365 Germany, sign in with your work or school account to portal.office.de and select OneDrive . -
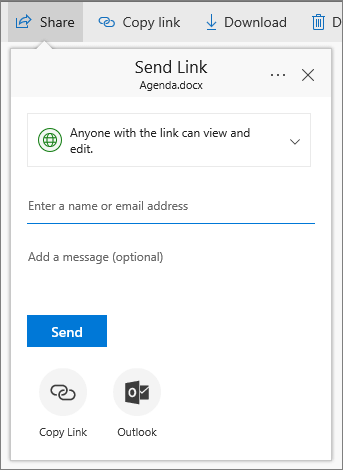
Select the file or folder you want to share, and then select
 Share.
 -
Enter a name or email address.
Note: Select the drop-down to change permissions. Allow editing is checked by default. To change permission to view only, uncheck this box and select Apply.
-
Select Send.
Get a link for sharing
-
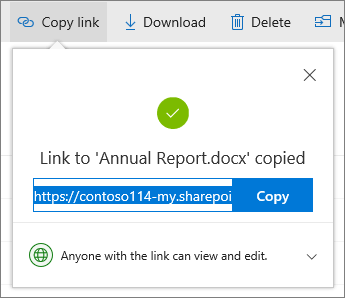
Select a file or folder and select Copy link.
-
Select the drop-down if you want to change permissions.
-
Select Copy.
-
Paste the link (Ctrl+V) where you want, for example, in an email or on a website.
See who you shared a file with
-
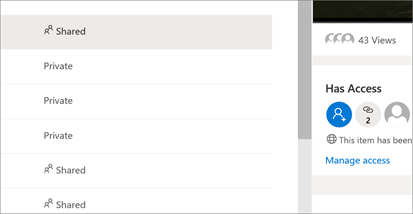
Look at the Sharing column to see which files you shared.
-
Select Shared to open the Details pane and see who has access.
-
Select Manage access to stop sharing or change if people can edit or just view the doc.
-
-
Locked Out of Focus? 📑
-
Employee or Student Login Issues 🚫
Whenever a Windows 10 device restarts or in some instances it completely shuts off due to required push-updates, the device may start on the Welcome Screen, which displays "Other user".
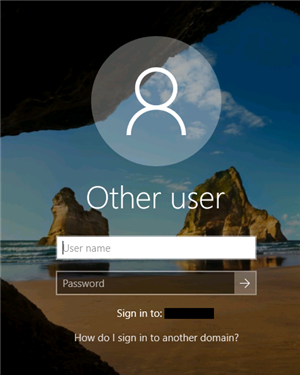
This typically means that the device has completely signed off the most recent profile session. In this case, the full account's address is necessary to login.
In the case of an Employee, the username and "@osceola.k12.fl.us" will be required.
Example:
Username: challengr
Full Username: challengr@osceola.k12.fl.us
In the case of a Student, the username and "@student.osceolaschools.net" will be required.
Example:
Username: 0009999
Full Username: 000999@student.osceolaschools.net
In the scenario that this method does not work, you might have other issues that require further troubleshooting. In that case, it is suggested to submit a ServiceDesk ticket for immediate service (For Student accounts) or Dial Ext: 24490 (For Employee accounts).
-
Reset your Personal Voicemail 📠
In these steps I'm going to show you how to reset your extension's personal voicemail. Let's start by heading to:
Once there, login using your District credentials (@osceola.k12.fl.us is not required in this instance) input your Username and Password and click "Login"
After login is successful, select " Messaging Assistant", which allows you to change settings within your voicemail.
Note: Under "Messaging Assistant" you're also able to change your "Greetings", allowing you to record a personalized message for those calls forwarded to your voicemail.
On this menu, hover your mouse over to "Passwords", and select "Change PIN"

Select and input your new 4-digit PIN, and click "Save".
-
HoverCam Flex 11 Tips 🎥
Rotate, Focus, Zoom, and Brightness
Recording, Timelapse, and Multi-Scan


