- Island Village Elementary
- Tech's Tips 💻💡
For Staff
-
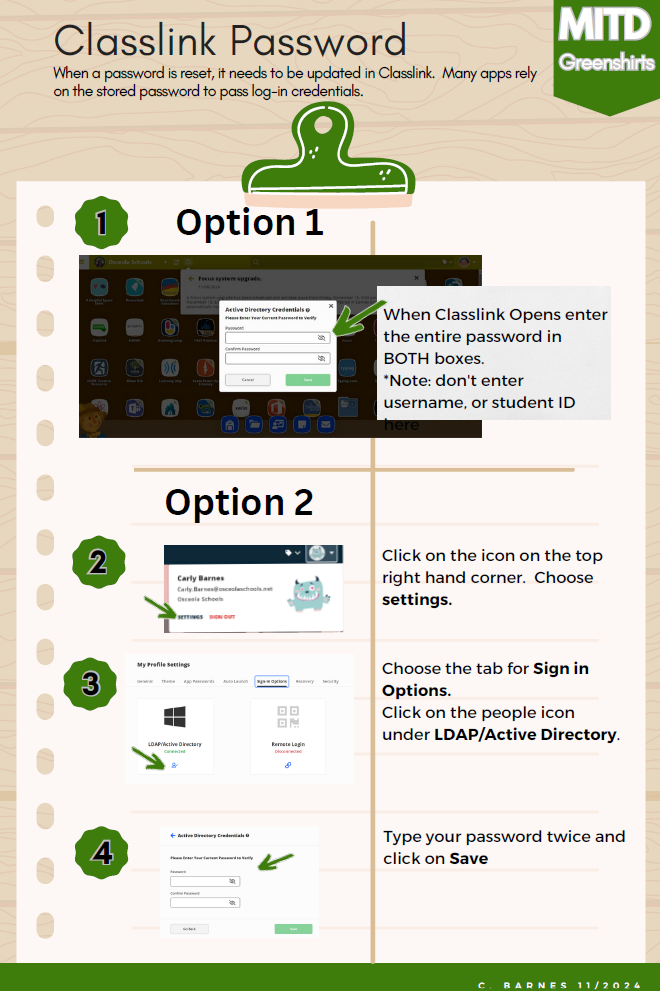
ClassLink Password 🔐 (Important Update)

-
Incident IQ - How to Submit a Ticket 🎫
-
Using SMART Mirror® App 💻
How To Connect
Using Tools within SMART Mirror®
Host a Session (Moderator Mode)
-
HoverCam App Tips 🎥
Rotate, Focus, Zoom, and Brightness
Recording, Timelapse, and Multi-Scan
-
Using iOS Classroom App (K - 1st Grade) 📱


-
Employee or Student Login Issues 🔑
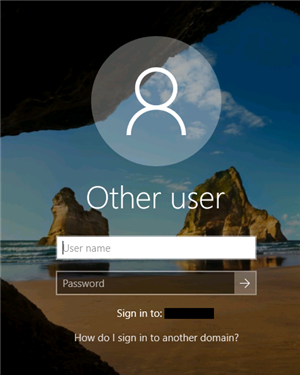
Whenever a Windows 10 device restarts or in some instances it completely shuts off due to required push-updates, the device may start on the Welcome Screen, which displays "Other user".

This typically means that the device has completely signed off the most recent profile session. In this case, the full account's address is necessary to login.
In the case of an Employee, the username and "@osceola.k12.fl.us" will be required.
Example:
Username: challengr
Full Username: challengr@osceola.k12.fl.us
In the case of a Student, the username and "@student.osceolaschools.net" will be required.
Example:
Username: 0009999
Full Username: 000999@student.osceolaschools.net
In the scenario that this method does not work, you might have other issues that require further troubleshooting. In that case, it is suggested to submit a ServiceDesk ticket for immediate service (For Student accounts) or Dial Ext: 48490 (For Employee accounts).
-
Reset/Change Voicemail PIN 📠
In these steps I'm going to show you how to reset your extension's personal voicemail. Let's start by heading to:
Once there, login using your District credentials (@osceola.k12.fl.us is not required in this instance) input your Username and Password and click "Login"
After login is successful, select " Messaging Assistant", which allows you to change settings within your voicemail.
Note: Under "Messaging Assistant" you're also able to change your "Greetings", allowing you to record a personalized message for those calls forwarded to your voicemail.
On this menu, hover your mouse over to "Passwords", and select "Change PIN"

Select and input your new 4-digit PIN, and click "Save".
-
Share Files with OneDrive 📁
Share a file or folder
-
Sign in to office.com and select OneDrive.
Note: If you're using Microsoft 365 operated by 21 Vianet, sign in with your work or school account to login.partner.microsoftonline.cn and select OneDrive.
If you're using Microsoft 365 Germany, sign in with your work or school account to portal.office.de and select OneDrive . -
Select the file or folder you want to share, and then select
 Share.
 -
Enter a name or email address.
Note: Select the drop-down to change permissions. Allow editing is checked by default. To change permission to view only, uncheck this box and select Apply.
-
Select Send.
Get a link for sharing
-
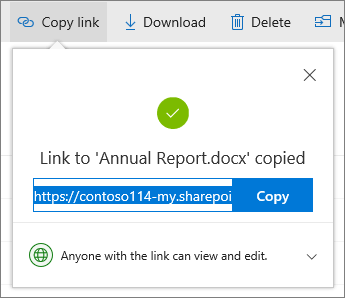
Select a file or folder and select Copy link.
-
Select the drop-down if you want to change permissions.
-
Select Copy.
-
Paste the link (Ctrl+V) where you want, for example, in an email or on a website.

See who you shared a file with
-
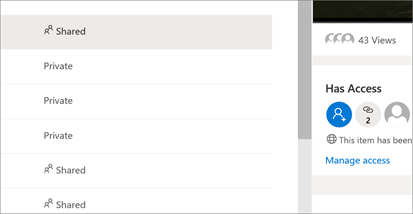
Look at the Sharing column to see which files you shared.
-
Select Shared to open the Details pane and see who has access.
-
Select Manage access to stop sharing or change if people can edit or just view the doc.

-

